

Training Video Creation: A Creator’s Guide to Engaging Content

Making a truly effective training video can seem like a monumental task, but it really just comes down to a clear, repeatable process. I've found that breaking training video creation into four distinct phases—planning, production, post-production, and distribution—is the key. Following a solid structure is your best defense against wasted effort and a final video that just doesn't connect.
Table of Contents
Your Blueprint for Effective Training Videos
Let's be honest: turning a concept into a polished, professional training video feels daunting. But with the right roadmap, it's completely doable. A methodical workflow means every step builds on the last, saving you headaches and leading to a much better final product that your audience will actually value.
For anyone looking to become a successful digital creator, mastering this process is how you turn your expertise into a real, monetizable asset. It transforms a big technical challenge into a series of manageable tasks.
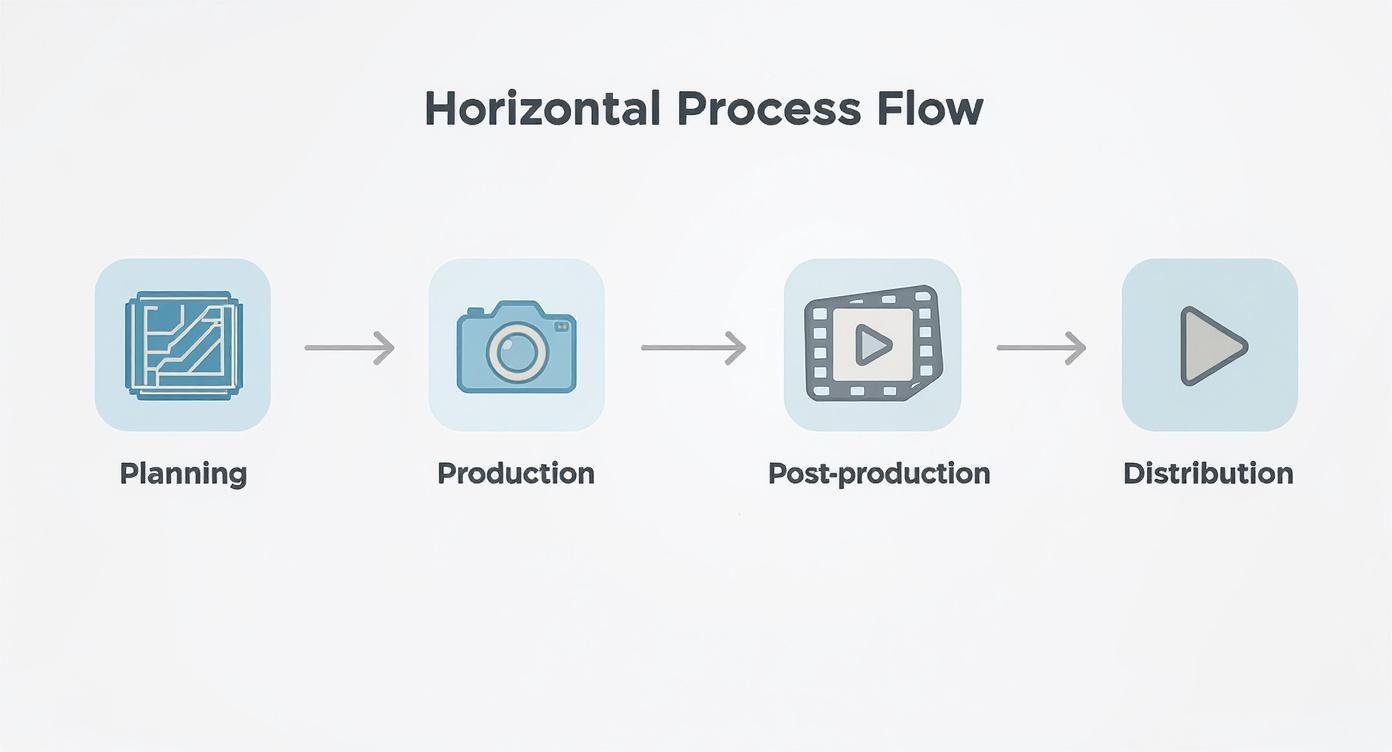
The infographic below lays out this simple, four-part flow perfectly.
 video creation” />
As you can see, the real work starts long before you hit the record button and doesn’t end until long after the final cut is made. Each stage sets the foundation for the next.
To give you a clearer picture, I've broken down the entire workflow into a simple table. This is the same framework I use to keep projects on track and ensure nothing gets missed.
The Four Phases of Training Video Production
| Phase | Key Activities | Primary Goal |
|---|---|---|
| Planning | Define audience, set learning objectives, scriptwriting, storyboarding. | Create a solid blueprint to guide the entire project. |
| Production | Filming, screen recording, gathering B-roll, recording voice-overs. | Capture all the raw visual and audio content needed. |
| Post-Production | Editing video and audio, adding graphics, color correction, rendering. | Assemble and polish the raw footage into a cohesive final video. |
| Distribution | Uploading to a host, setting up monetization, marketing, and engagement. | Get the finished video to your audience and achieve your business goals. |
Following these phases in order will bring structure and clarity to your video creation, making the whole process far less intimidating and much more effective.
The Growing Demand for Video Learning
The move toward video-based learning isn't just a small shift; it's a massive market force. The global online learning market was already valued at around USD 314.03 billion in 2024, and it's not slowing down.
In fact, the eLearning video market specifically is projected to grow at a compound annual rate of 15.2% through 2029. That’s a huge opportunity for creators who can produce quality content.
This growth means that learners now expect high-quality, engaging video. If you want to dive deeper, this is a comprehensive guide on how to create training videos that truly engage and educate.
From Creation to Community
Once your video is edited and ready, the final step is getting it to your audience. This is where you host, sell, and build a community around your content. For creators in Poland, this part can be a real headache, often involving patching together different tools for payments, video hosting, and community management.
That's exactly the problem a platform like Zanfia is designed to solve. As a Polish all-in-one platform, it bundles native video hosting, community spaces, and multiple monetization models into one place—all with 0 % platform fees. This lets you focus on what you’re good at: creating amazing content. The platform handles the tedious backend work, from automatically generating invoices with inFakt or Fakturownia to instantly granting course access after a purchase—saving you 5-10+ hours a month.
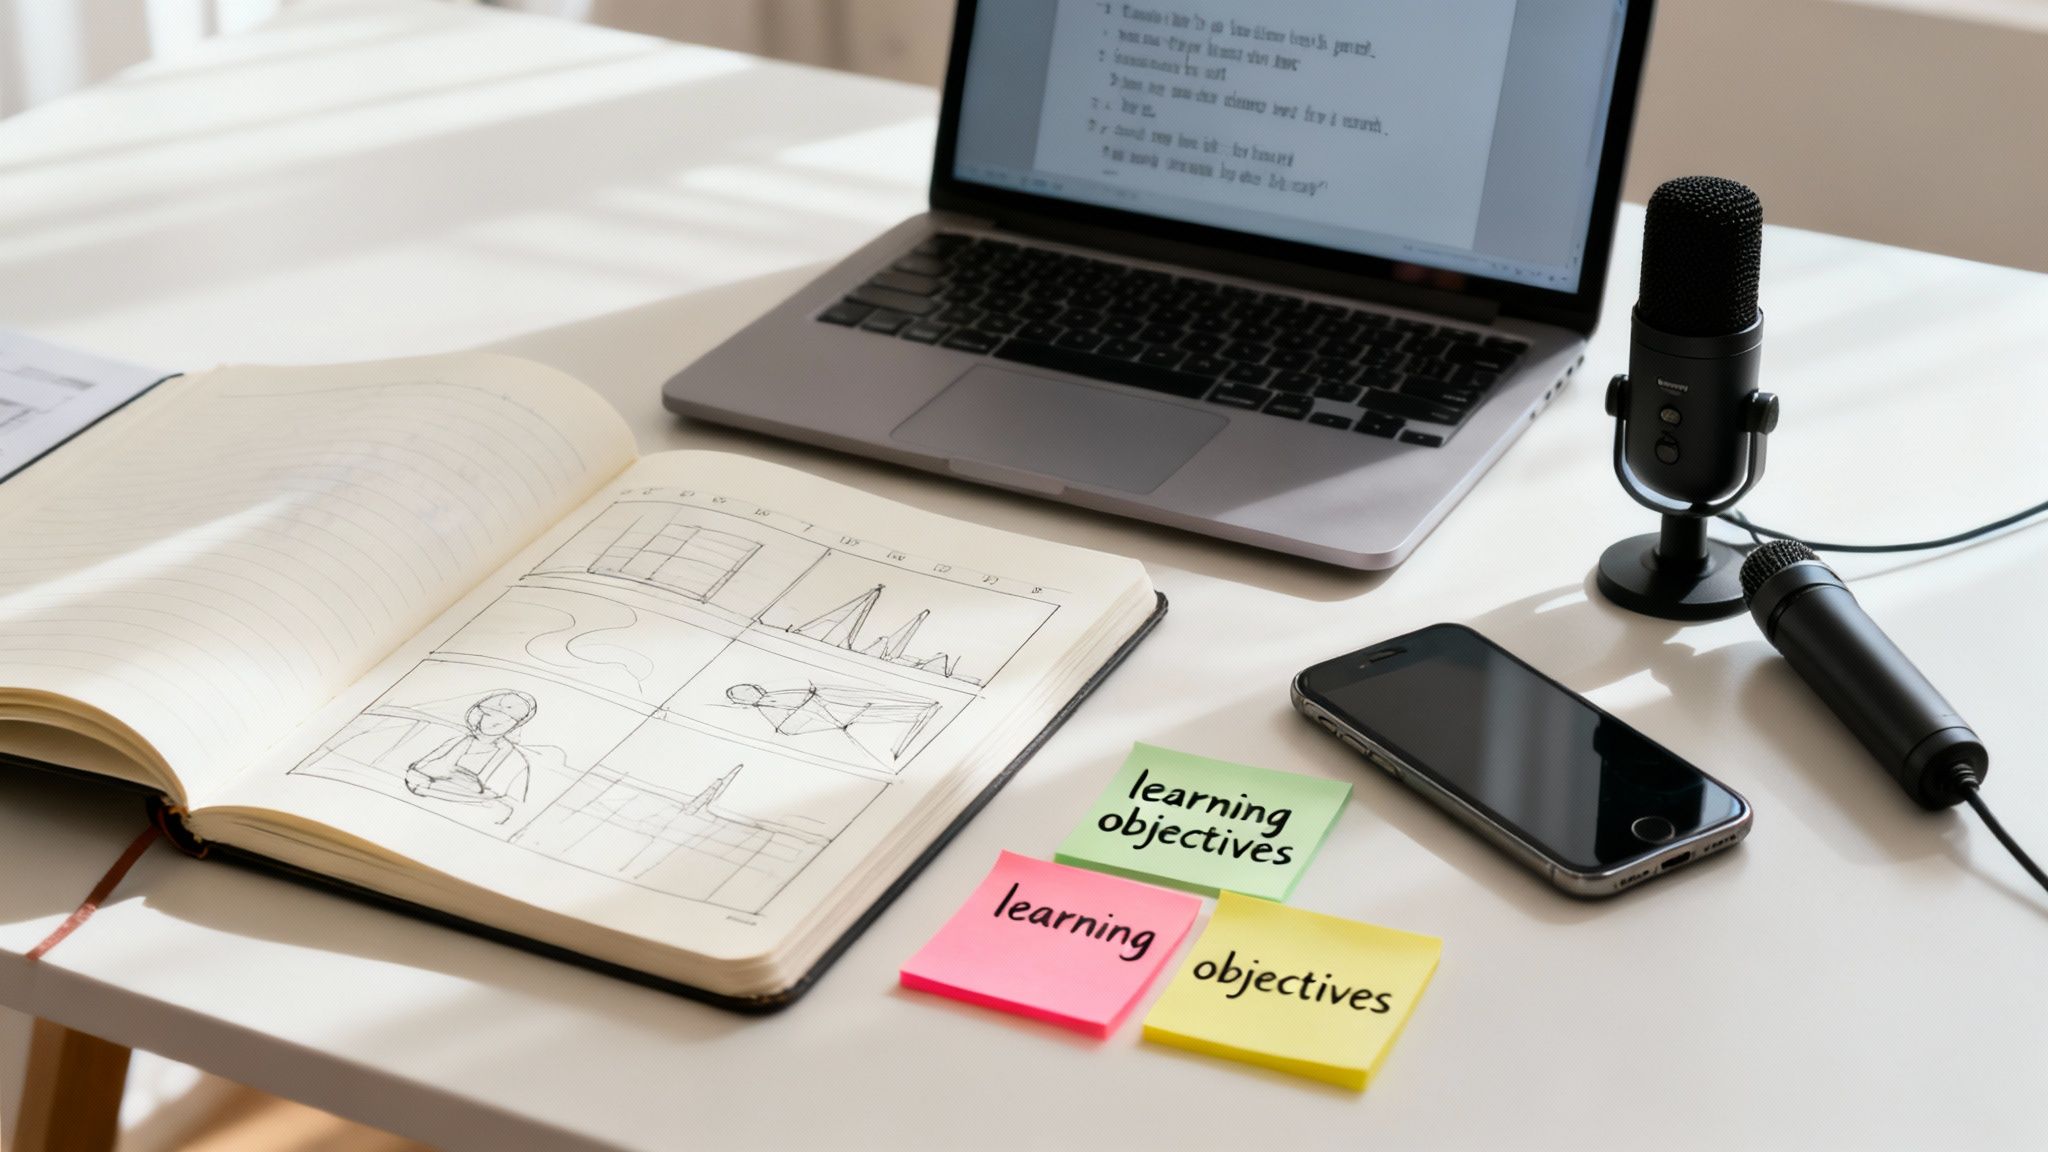
Building Your Pre-Production Masterplan
The real magic behind a great training video happens long before you ever hit the record button. It’s a common misconception that you need expensive gear to get professional results. The truth? Meticulous planning is the single most important factor. This pre-production phase is where you lay the groundwork, creating a strategic blueprint that guides every single decision from here on out.
Think of it like building a house. You'd never start laying bricks without a detailed architectural plan. In the same way, jumping into recording without a clear objective and a solid script is a surefire way to create a confusing, ineffective video. You’ll just end up wasting a ton of time and resources.
What’s the Point? Define Your Learning Objectives
Before you do anything else, you have to answer one critical question: What should the viewer be able to do after watching this video? Your answer is your learning objective. It's the North Star for the entire project.
Vague goals like "teach them about the software" just won't cut it. You need to get specific. A much stronger objective sounds something like this: "After watching this video, the user will be able to create and send their first invoice using our software in under three minutes." Now that's a clear goal. It immediately tells you what content is essential and what you can safely leave out.
For a deeper dive into this, our guide on how to create a curriculum provides a fantastic framework for structuring your content.
Who Are You Talking To? Understand Your Audience
Seriously, who is this video for? The way you'd explain something to a brand-new hire is completely different from how you'd talk to a seasoned power user. Knowing your audience shapes everything—from the language you use to the complexity of the examples you show.
Ask yourself a few key questions:
- Existing Knowledge: Are they total beginners or do they already know the basics?
- Technical Comfort: How savvy are they with this type of tool or subject matter?
- Learning Style: Do they need a quick, high-level overview or a detailed, step-by-step walkthrough?
Getting clear on these points helps you craft a message that actually connects. When viewers feel like a video was made just for them, they're far more likely to pay attention and retain the information.
Pick the Right Tool for the Job: Choose a Video Format
Not all training content is the same, so your video format shouldn't be either. The style you choose needs to align with your learning objective and the type of information you're presenting.
Here are a few of the most popular formats:
- Screencasts: These are your go-to for software demos and process walkthroughs. You’re essentially recording your screen with a voiceover, showing viewers exactly what to click and where to go.
- Talking Head: This is you, on camera, speaking directly to the viewer. It's fantastic for building a personal connection, explaining concepts, and delivering more lecture-style content.
- Animations: Got a complex or abstract idea that’s tough to show in real life? Animation is your best friend. Explainer videos lean on this format to make complicated topics feel simple and easy to grasp.
Don’t be afraid to mix and match! You could start a screencast with a talking-head intro to add a human touch. The goal is to choose the format that best serves the information you're trying to teach.
Get It on Paper: Scripting and Storyboarding
This is where your video really starts to come to life. A script isn’t just a transcript of what you’ll say; it’s the structural backbone of your entire video.
Key Takeaway: A well-written script is your most valuable editing tool. It stops you from rambling, makes sure you hit every critical point in a logical order, and will save you hours of pain in post-production.
Start with a simple outline: an interesting hook, the core instructional content, and a clear summary or call to action at the end. Write it like you talk. Then, read it out loud. You'll immediately catch any awkward phrasing or sentences that are too clunky.
Next up is the storyboard. You don't need to be an artist for this. A storyboard can be as simple as a few stick figures or even just text descriptions of what will be on screen as you read each line of the script. This forces you to think visually and ensures what people see perfectly matches what they hear.
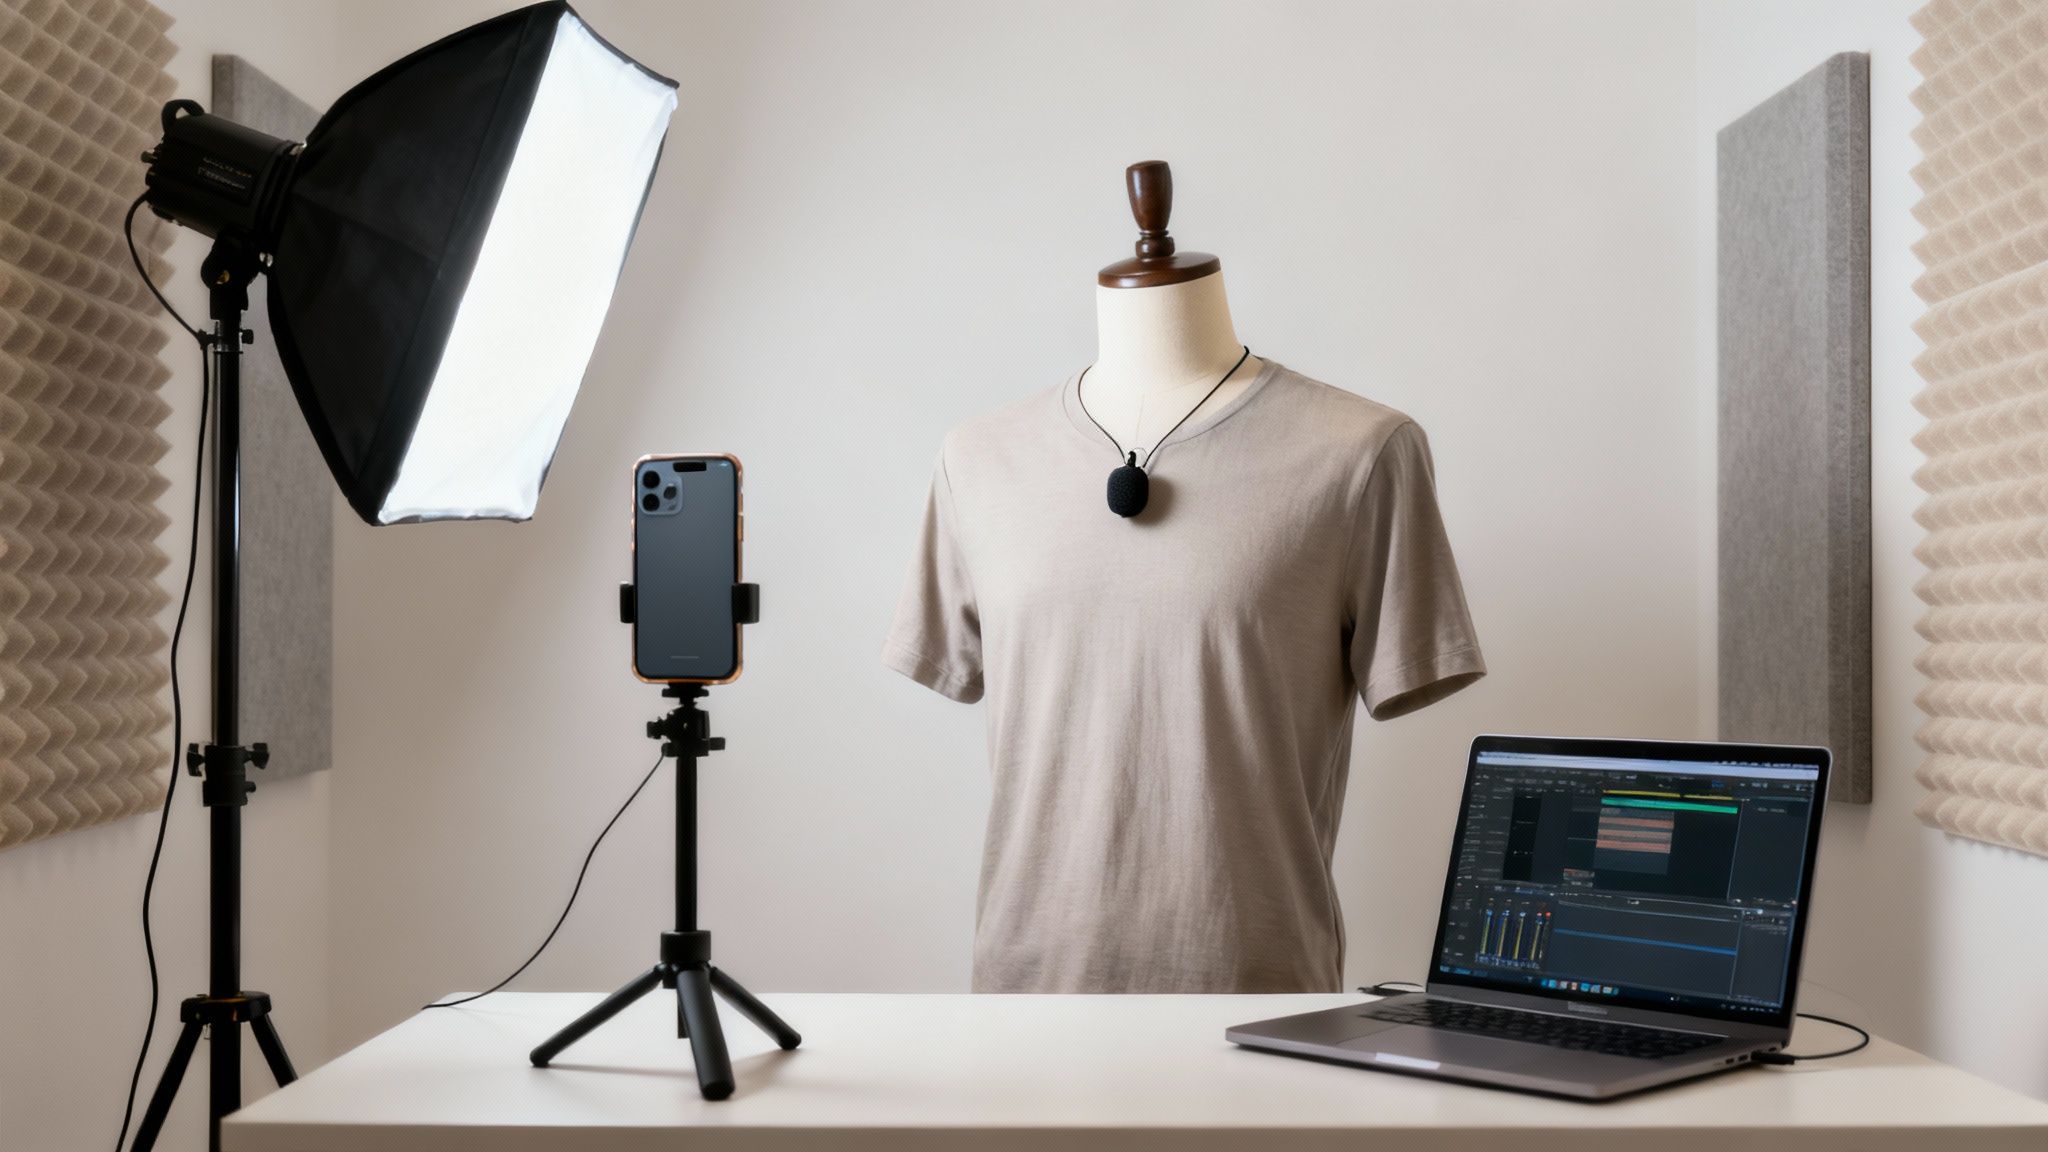
Time to Gear Up: Gather Your Essential Equipment
Good news: you don't need a Hollywood budget to make a polished training video. For most people, the best camera is the one in their pocket. That said, a few key pieces of gear can make a massive difference in quality.
| Equipment Type | Budget-Friendly Option | Recommended Upgrade | Why It Matters |
|---|---|---|---|
| Microphone | Lavalier mic (plugs into phone) | USB condenser microphone | Clear audio is non-negotiable. People will forgive shaky video, but they will click away instantly from bad sound. |
| Camera | Modern Smartphone | DSLR or Mirrorless Camera | A crisp, clear image looks more professional and builds credibility with your audience. |
| Lighting | Natural light from a window | Ring light or softbox kit | Good lighting makes you look great, eliminates distracting shadows, and gives your video a polished, professional feel. |
If you only have the budget to upgrade one thing, make it your microphone. You can get away with so-so video if your audio is crystal clear, but the reverse is never true. With a solid plan and some basic equipment, you're perfectly set up for a smooth recording session.
Recording with Confidence and Clarity
Okay, you've done the hard work of planning and scripting. Now for the fun part: hitting record. This is where your vision starts to come to life. The goal here isn't to get a perfect, one-take wonder. Instead, think of it as gathering all the raw materials—the building blocks you'll piece together later.
What makes for great raw material? Just two things, really: clean visuals and crisp audio. If you can nail those, you’re already miles ahead of most, and your editor (even if that's you) will thank you for it.
Setting Up Your Recording Space
You absolutely do not need a professional studio to get professional-looking results. The right environment makes all the difference, and a few simple tweaks can elevate your video quality immensely.
Let's start with sound, because bad audio is a deal-breaker for viewers. Hard surfaces—like bare walls or hardwood floors—are your enemy. They create that echoey, amateur-hour sound. The fix? Record in a room with soft things. Carpets, curtains, a couch, even a packed bookshelf will absorb sound wonderfully. In a pinch, you can even hang a couple of heavy blankets just off-camera. It sounds silly, but it works wonders.
Next up, your background. Keep it clean and uncluttered. Anything messy or busy in the shot will pull your viewer's attention away from you and what you're saying. A simple bookshelf, a plain wall with a single piece of art—that's all you need.
And finally, lighting. The best light is free. Just find a window and face it. That soft, natural light is incredibly flattering. The one thing you must avoid is having a bright window or lamp behind you. It'll turn you into a dark, faceless silhouette, and nobody wants that.
Mastering Your On-Camera Presence
Talking to a camera lens can feel weird at first. I get it. The trick is to stop thinking about it as a camera. Instead, speak directly into the lens as if you're making eye contact with a friend. Don't look at yourself on the screen; that disconnects you from the audience.
Here are a few other things I've learned that help:
- Bring the energy. Your voice naturally flattens out on recordings. You have to consciously inject a bit more enthusiasm and tonal variety than you would in a normal chat.
- Use your hands. Gesturing is normal! It makes you look more comfortable and helps emphasize your points. Don't keep them locked down.
- Smile! A real smile makes you seem approachable and confident, which helps your viewers relax and trust what you're saying.
Here’s a little mindset shift that helps a ton: You aren't giving a formal speech. You're just having a one-on-one conversation. Imagine you're explaining this idea to a single person who’s genuinely interested. This little mental trick can make your delivery feel so much more authentic. For a deeper dive, check out our guide on how to create powerful video training.
Best Practices for Screen Recording
For a lot of training content, the screen recording is the main event. Getting this right is just as important as how you look on camera.
Before you hit record, tidy up your digital space. Close all those extra browser tabs, turn off notifications, and maybe switch to a clean desktop background. Tools like OBS (Open Broadcaster Software) or Loom are fantastic for this. Do a quick practice run to make your mouse movements smooth and intentional.
A classic mistake is zipping the cursor all over the screen. Slow it down. Make your movements and clicks deliberate so people can actually follow what you're doing. Many screen recorders have features to highlight your cursor or clicks, which is a huge help for clarity.
It’s worth getting this right. Video is dominating engagement, and the need for clear training is exploding. In fact, there were over 3.5 billion mobile video viewers back in 2023, and that number is only climbing. You can read up on more of these video marketing statistics on SundaySky if you're curious.
One last pro tip: create a simple file naming system now. Something like "Module1_Lesson2_Video_2024-10-26.mp4" will save you from a world of confusion when you get to the editing stage. Trust me on this one.
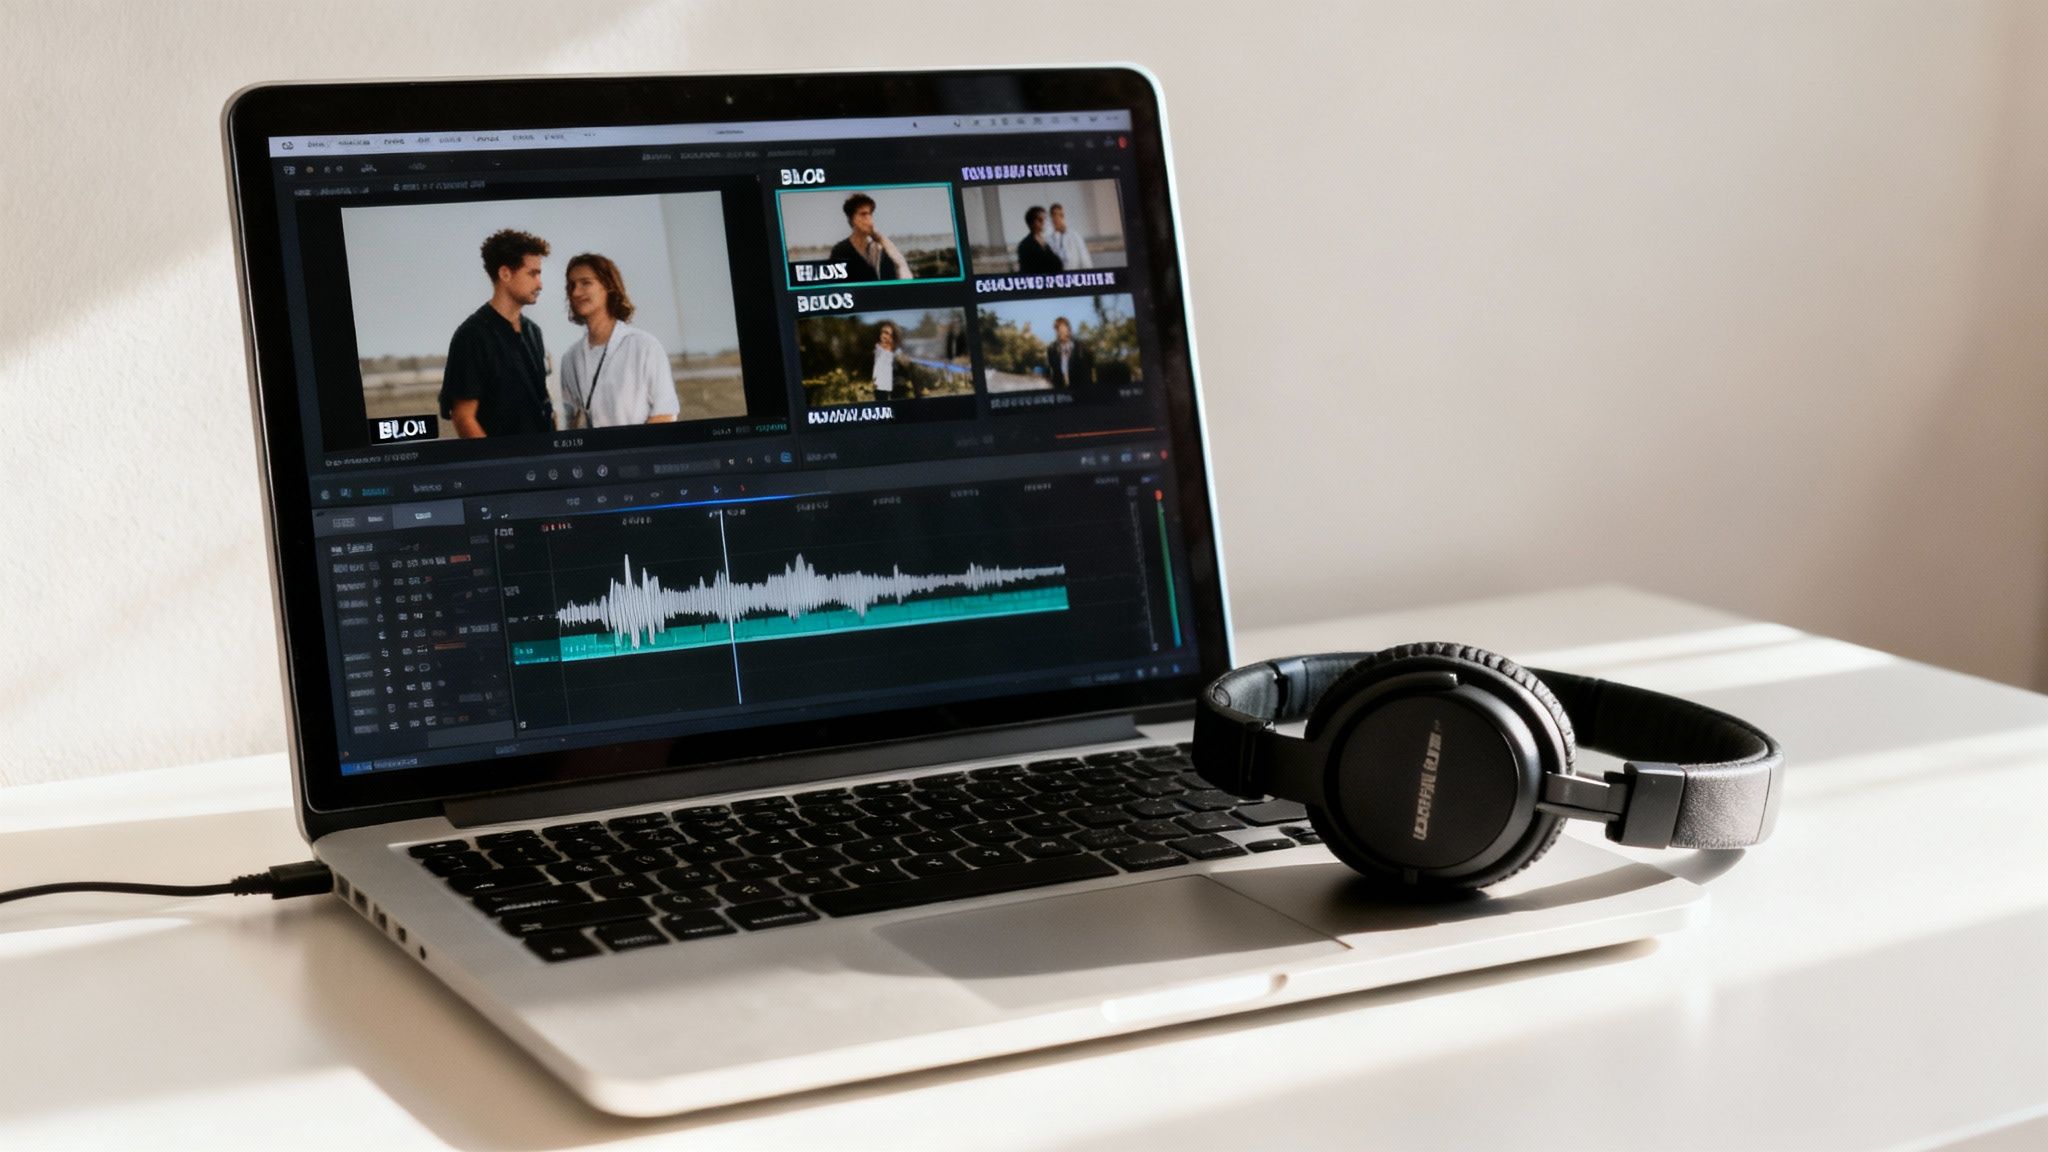
Polishing Your Content in Post-Production
This is where the magic really happens. Post-production is the stage where your raw footage transforms into a polished, professional training video. Think of it less as a technical chore and more as the final storytelling pass. Your goal here is to assemble, refine, and enhance your content to create a clear and engaging final cut.
Great editing should be invisible. It’s all about serving the content—making it easier to follow, more interesting to watch, and ultimately, more effective for the learner. You'll weave together the best takes, snip out the inevitable mistakes, and pace the video to keep your audience hooked from start to finish.
Assembling Your Core Narrative
Before you get fancy, you need to build the foundation. Start by laying out your best takes—what we call the "A-roll"—on your editing timeline. Just follow your script and get the main pieces in order. Don't sweat the small stuff yet.
The main goal at this point is simply to create a clean, logical flow. This is your chance to make the first big cuts. Trim out any verbal stumbles, awkward pauses, or phrases you accidentally repeated. Often, a simple "jump cut" to slice out a mistake is all you need to make the whole thing feel tighter and more professional.
Choosing Your Editing Software
Don't feel like you need a Hollywood-level budget to edit great training videos. There are tons of fantastic, user-friendly tools out there that have more than enough power for what you need. The trick is finding one that fits your comfort level and budget.
| Software Level | Popular Examples | Best For |
|---|---|---|
| Beginner (Free) | DaVinci Resolve (Free Version), CapCut | Creators on a budget who need basic cutting, text, and transitions. |
| Intermediate | Camtasia, Descript | Screen-recording heavy content and creators who want a simple, powerful workflow. |
| Advanced | Adobe Premiere Pro, Final Cut Pro | Professionals who need advanced color grading, effects, and integration with other tools. |
My advice? Start with a free or intermediate tool. You can always move up to something more powerful later if you find you need it. Honestly, most creators find that a tool like Camtasia hits the perfect sweet spot for training video creation.
Enhancing Learning with Visuals and Audio
With your main story in place, it’s time to add the layers that really make your video pop. These elements aren't just window dressing; when used correctly, they guide the viewer's attention and reinforce the most important takeaways.
Here are a few essential enhancements I always recommend:
- Text Overlays and Callouts: Use these to highlight key terms, definitions, or steps. A simple text box can make sure a critical piece of information lands.
- B-Roll Footage: This is your supporting footage. If you’re talking about a specific feature in a software, show a close-up of it in action. Discussing a broader concept? Relevant stock footage can help illustrate your point.
- Simple Graphics: You don't need to be a graphic designer. Adding a simple arrow to point to a button in a screen recording or using a basic chart to visualize data can boost clarity immensely.
- Background Music: A subtle, royalty-free music track can add a layer of polish and energy. The key is to keep it quiet enough that it never distracts from your voice.
Key Insight: Every single enhancement should serve a purpose. Before adding a graphic, sound, or B-roll clip, ask yourself: "Does this help the learner understand?" If it doesn't add clarity or context, it's just noise. Leave it out.
Editing is also a great time to think about making your future work easier. By creating and saving templates for your graphics or intro/outro sequences, you can build a more efficient workflow. That kind of system-building is a huge part of our philosophy at Zanfia, where our built-in automations regularly save creators 5–10+ hours a month. You can apply that same mindset here.
And once your video is done, don't just let it sit there! For more ideas on getting the most out of your finished work, check out these effective content repurposing strategies.
Hosting and Selling Your Videos with Zanfia
You’ve done the hard work—your video is edited, polished, and ready to go. So, what’s next? This is where many creators hit a wall, finding themselves tangled in a web of separate tools for video hosting, payment processing, and community management. It can be a real headache.
This is precisely why we built Zanfia: to give Polish creators a single, powerful platform to handle everything. Instead of juggling a Vimeo subscription for hosting and a separate payment gateway, you can use Zanfia’s built-in native video hosting. This doesn't just cut your monthly costs; it keeps your students right where you want them—inside your own branded ecosystem. No more sending them off to another website, which can feel jarring and unprofessional.
Keeping your courses, sales, and community under one roof is more than just convenient. It’s a strategic move that reinforces your brand identity and goes a long way toward keeping your members engaged and loyal.
Maximize Your Revenue with Flexible Monetization
Once your video is uploaded, you need smart ways to sell it. A one-size-fits-all approach just doesn't cut it in today's market. That's why Zanfia gives you a full suite of monetization tools, so you can build a revenue model that truly fits your business.
You've got options:
- One-Time Purchases: The classic approach. Perfect for selling a standalone course or a signature training video.
- Subscriptions: Want predictable, recurring revenue? Offer ongoing access to your content library for a monthly or annual fee.
- Installment Plans: Make your premium courses more accessible by letting customers pay over time. This can be a game-changer for conversion rates.
- Product Bundles: Increase your average order value by packaging several courses together or combining a course with access to your private community.
This kind of flexibility is essential. It lets established "Business Architects" scale their offers while giving "Potential Explorers" a low-risk way to get their first product out the door.
The Zero Percent Platform Fee Advantage
Here’s one of the biggest things that sets Zanfia apart: our pricing. Many international platforms will take a cut of every single sale you make. We don’t. Zanfia charges zero-percent (0 %) platform transaction fees. For creators earning PLN 10k–100k+ a month, this is a massive win, letting you escape the commission fees that eat away at your hard-earned profits.
You keep 100 % of your sales revenue. The only fees you’ll ever see are the standard rates from payment processors like Stripe, PayU, Przelewy24, or BLIK. It’s a transparent, fair approach that means we grow with you, not at your expense.
This model changes the entire relationship between a creator and their platform. It means you can reinvest more money back into your business—whether that's for marketing, better equipment, or simply creating more amazing content for your audience.
Hosting Platform Comparison: Zanfia vs. Alternatives
Choosing a platform can feel overwhelming, especially for Polish creators who have unique needs regarding payments, language, and support. Let's break down how Zanfia stacks up against common alternatives.
| Feature | Zanfia | WordPress + Plugins | International Platforms (e.g., Kajabi) |
|---|---|---|---|
| All-in-One Solution | Yes, fully integrated hosting, sales, and community. | No, requires patching together multiple (often paid) plugins. | Yes, but often with complex features not tailored to the Polish market. |
| Platform Fees | 0 % transaction fees. | Varies by plugin, but many payment gateways take a cut. | Typically 2-10% of your revenue, plus monthly fees. |
| Local Payments | Full integration with PayU, BLIK, Przelewy24, and Tpay. | Can be complex to set up; not all plugins support local options. | Limited or no support for Polish payment gateways like PayU or BLIK. |
| Video Hosting | Native video hosting included (plus integrations). | Requires a paid third-party service like Vimeo or Wistia. | Included, but often with storage or bandwidth limits. |
| Support | Dedicated, Polish-speaking support team. | Relies on community forums or individual plugin developers. | English-only support, often in different time zones. |
| Ease of Use | Designed for simplicity. No technical skills required. | Steep learning curve; requires ongoing technical maintenance. | Can be overly complex, with features you may never use. |
Ultimately, while WordPress offers flexibility and international platforms have a broad feature set, Zanfia provides a seamless, cost-effective, and fully localized solution designed specifically to help Polish creators succeed.
A Smarter Viewing Experience for Your Students
A clunky video player can ruin an otherwise great course. That's why we focused on creating a superior learning experience. Zanfia's smart video player is designed from the ground up with your students in mind, and it automatically saves their progress within a video and across the entire course.
This isn't just a small perk. It means a student can watch half a lesson on their laptop during a lunch break and pick it up right where they left off on their phone later that evening. It’s a seamless experience that dramatically boosts course completion rates and cuts down on student frustration—both are critical for building a loyal audience that keeps coming back for more.
To stay ahead, you'll also want to promote your work effectively. For marketing your courses on public platforms like YouTube, using a YouTube Hashtag Generator can seriously improve your video's discoverability. While Zanfia gives you a premium, private space for your paid content, a strong public presence is the best way to drive traffic to it.
In the end, choosing your hosting and sales platform is the final, crucial piece of the puzzle. By bringing everything under one roof, keeping 100% of your revenue, and giving your students a best-in-class experience, you’re not just launching a video—you’re building a sustainable, long-term business.
Common Questions About Creating Training Videos
Even with the best plan in hand, you're bound to run into a few questions during the training video creation process. I've been there. Let's walk through some of the most common hurdles I see creators face and get you some practical answers.
How Long Should a Training Video Be?
This is always the first question, and the answer is almost always "shorter than you think." We're seeing a massive shift toward microlearning, so your sweet spot is typically between 3 and 10 minutes. This respects people's time and makes complex information much easier to absorb. Honestly, no one has the patience for a 45-minute video lecture anymore.
If you’re tackling a really dense topic, don't try to cram it all into one epic video. The best approach is to break it down into a series of shorter, focused videos. This creates a much more approachable learning path, lets students learn at their own pace, and makes it incredibly easy for them to find and re-watch a specific segment later.
This is exactly how modern learning platforms like Zanfia are designed to work. Its smart video player automatically saves a student's progress, so they can easily pick up where they left off as they move through your curriculum.
What Is the Most Important Piece of Equipment?
It's not your camera. It's your microphone. I can't stress this enough: crystal-clear audio is absolutely non-negotiable.
Think about your own experience. You’ll probably sit through a video with slightly grainy visuals if the content is great. But if the audio is muffled, full of static, or has a distracting echo? You're gone in 10 seconds.
If you're working with a tight budget, sink your money into a good external microphone first. A simple USB mic for your desk or an inexpensive lavalier mic that clips onto your shirt will be a massive upgrade from your laptop or phone's built-in mic. It's the single biggest factor in sounding professional.
Do I Actually Need a Script for My Videos?
Yes. One hundred percent, yes. Now, this doesn't mean you have to read from a teleprompter like a news anchor. But going into a recording without a script—or at the very least, a detailed outline—is a recipe for a long, frustrating editing session.
Here’s why a script is your best friend:
- It keeps you on track. You’ll cover every point you need to, in a logical order that makes sense to the viewer.
- It stops you from rambling. A script forces you to be concise and respect your audience's time.
- It saves you hours in editing. Trust me on this one. A tight recording means less time cutting out "ums," tangents, and mistakes.
Many seasoned creators I know prefer a bullet-point outline over a word-for-word script. It helps them sound more natural and conversational while still keeping them on point. That level of preparation is what separates the pros from the amateurs.
Key Insight: Your script is your roadmap. It provides structure and clarity, turning a potentially chaotic recording session into a focused, efficient process that produces a better final video.
How Can I Make My Training Videos More Engaging?
Engagement isn't just about what you say; it's how you say it and where you present it. It’s a blend of your content, delivery, and the learning environment itself.
First, you need a strong hook. In the first 30 seconds, tell people exactly what they're going to learn and why it's worth their time. As you teach, keep things visually fresh. Don't just stay on a single talking-head shot for 10 minutes. Cut to screen recordings, pop up simple graphics, or use B-roll footage to illustrate your points.
Use on-screen text to highlight key takeaways, and don't be afraid to ask rhetorical questions to get your audience thinking. Most importantly, let your passion for the subject shine through. Your energy is contagious.
Finally, think beyond the video itself. When you host your course on an integrated platform like Zanfia, you can build discussion channels and community forums right alongside your video lessons. This turns passive viewing into an active learning experience where students can ask questions and connect with each other, which is far more engaging than a standalone video ever could be.
Ready to stop juggling tools and start building your online business on a single, powerful platform? Zanfia gives you everything you need—native video hosting, 0% platform fees, and integrated community tools—all under your own brand. Discover how Zanfia can help you grow.


